Showing posts with label DIY. Show all posts

Saturday, March 27, 2021

March Card Roundup

 This month, we have several family birthdays!  I made 3 birthday cards this month that were a lot of fun, and very different!  Again, I am continuing my goal of not spending any money on new card supplies this year, so everything here was made with supplies that I have had since 2020 or earlier.  

I love the colors on this card!  The sentiment and the bottom strip were made last year using my Ken Oliver watercolor powders, pearlescent powder, and watercolor paper.  I die cut a bunch of stuff out of those papers when I made them and tucked it into a basket for future use.  I love grabbing those pieces and making cards based around them!  I matched it with this beautiful purple glitter paper from DCWV and a blue cardstock from Stampin Up.  I added black jewels and 33 in thickers to finish off the card.  


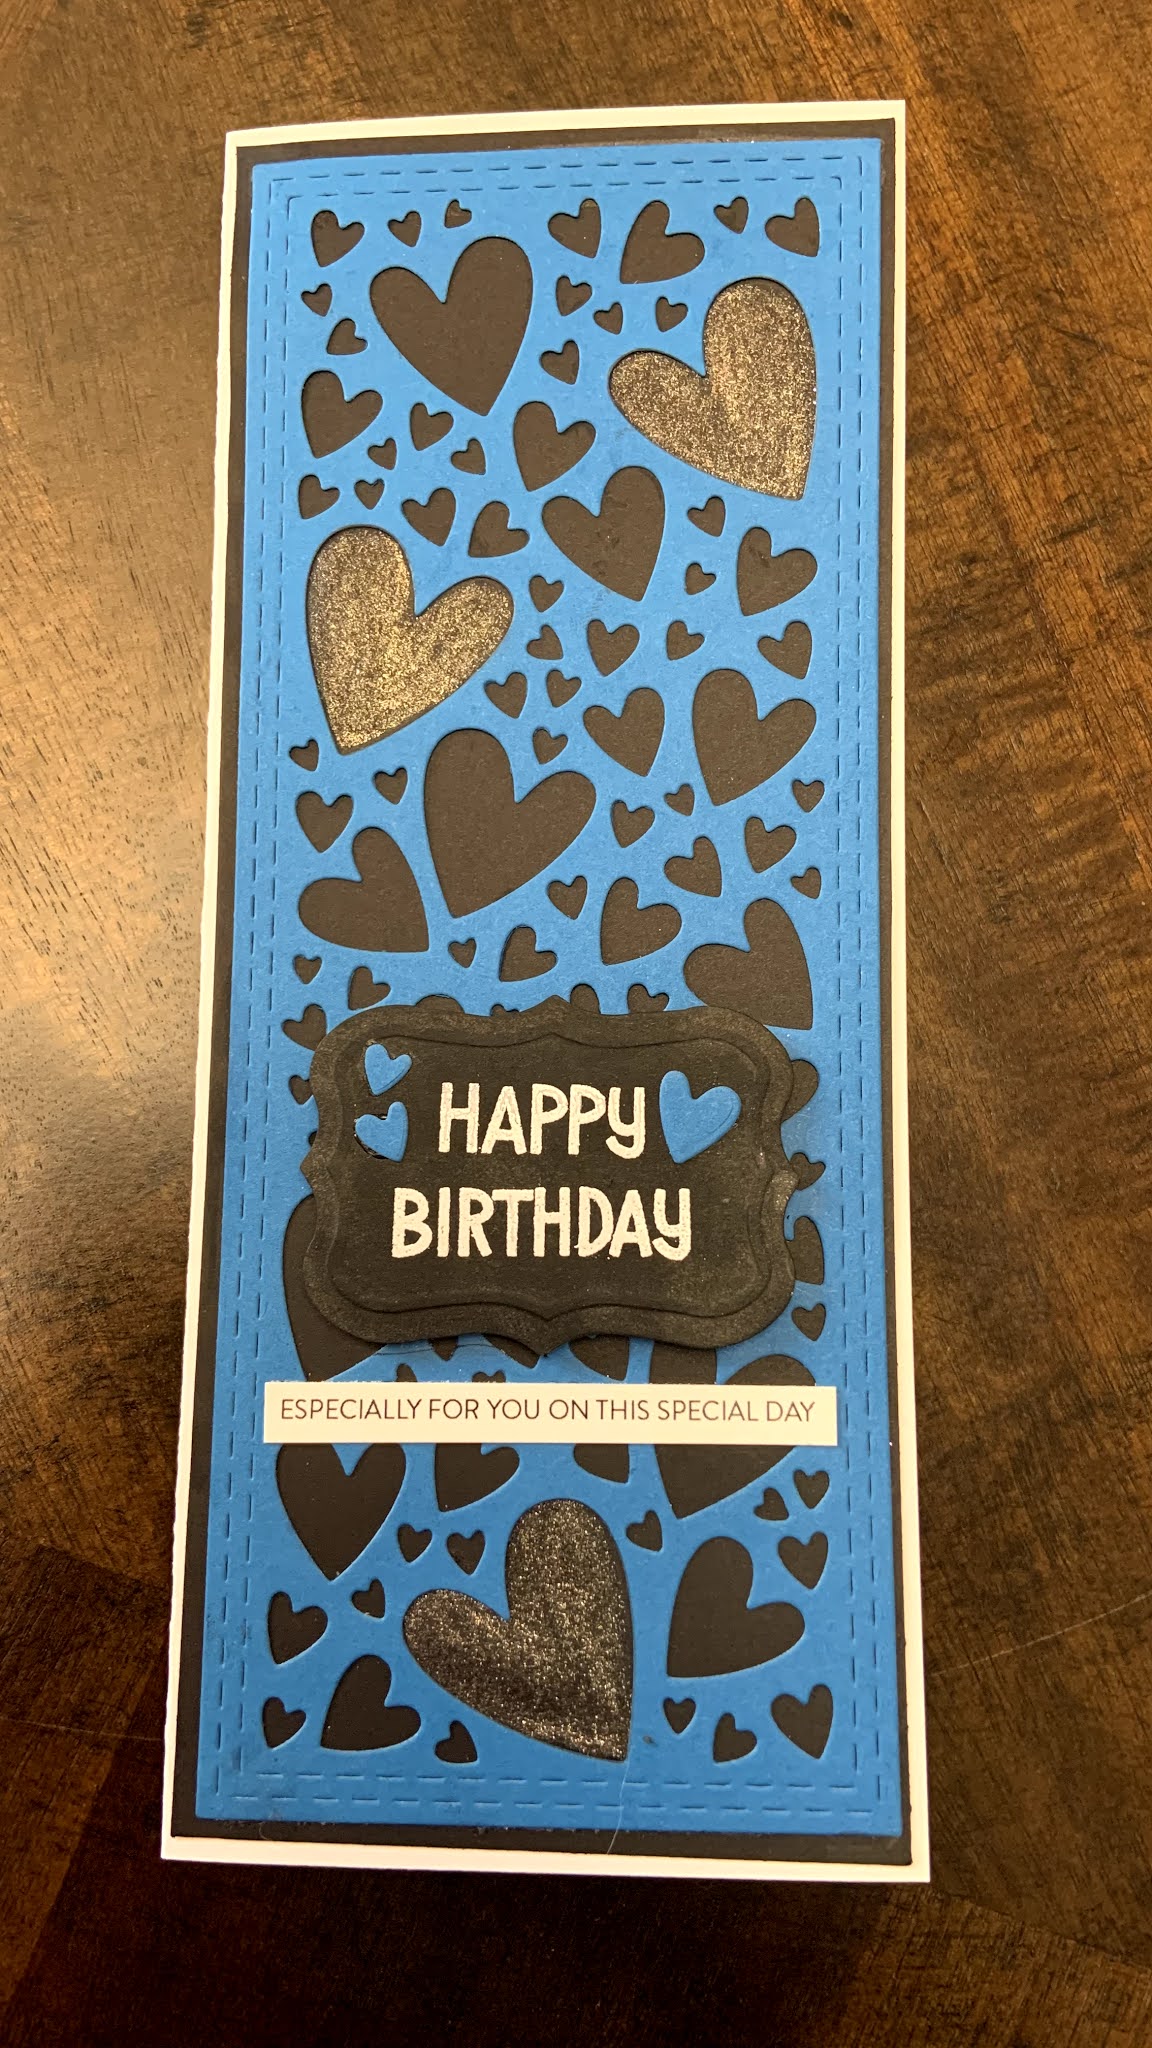
Isn't this die cut background so pretty?  And it gives you a bunch of really pretty smaller hearts to use as embellishments!  I colored in the biggest hearts with a Wink of Stella pen, and used a Lawn Fawn birthday sentiment to emboss the sentiment on a tag I had.  The smaller sentiment came from a set of sentiment strips I bought from Simon Says Stamp last year.  Slimline cards are a fun, different shape that mails very well and adds interest to the card.  

Finally, this card is a clean and simple design that's perfect for anyone!  This stamp from Waffle Flower is big and bold and one of my favorites.  This is an old patterned paper I found in my stash, and I added washi tape and buttons as clean embellishments.  The kraft on black looks so nice in my opinion.  

These are three different birthday designs that you could easily do with your own stamps or supplies!  The first one could be done with inks or watercolors of any kind, and could be made with any type of die cut sentiment.  The second card showcases a fun die cut, but could also be done with patterned paper as well if that's what you have!  The third one highlights a big and bold sentiment stamp with clean, simple details.  I hope that these cards give you some inspiration to pick up your own papercrafting supplies and send something! 

Tuesday, March 9, 2021

Canvas Painting with my Daughter - Fireflies in Mason Jars

Before the pandemic began, I really wanted to go to a studio that does paint and sip parties!  They looked like such a good time, and even though I'm not really an acrylic painter, I'm always up for an art adventure!  

But alas, Covid happened and I never got there.  Recently, I did venture into our local Dollar Tree.  I don't go hardly anywhere right now, but our Dollar Tree is rarely busy and right around the corner from my house, so I stopped by to specifically check out the crafting section!  I found SO many great things!!!  I'm doing a post later on this month about all of my favorite bargain finds, so this is just a preview!  They had SO many canvases!!!  I decided to snag 2 small canvases for my daughter and I, each 5x7:  

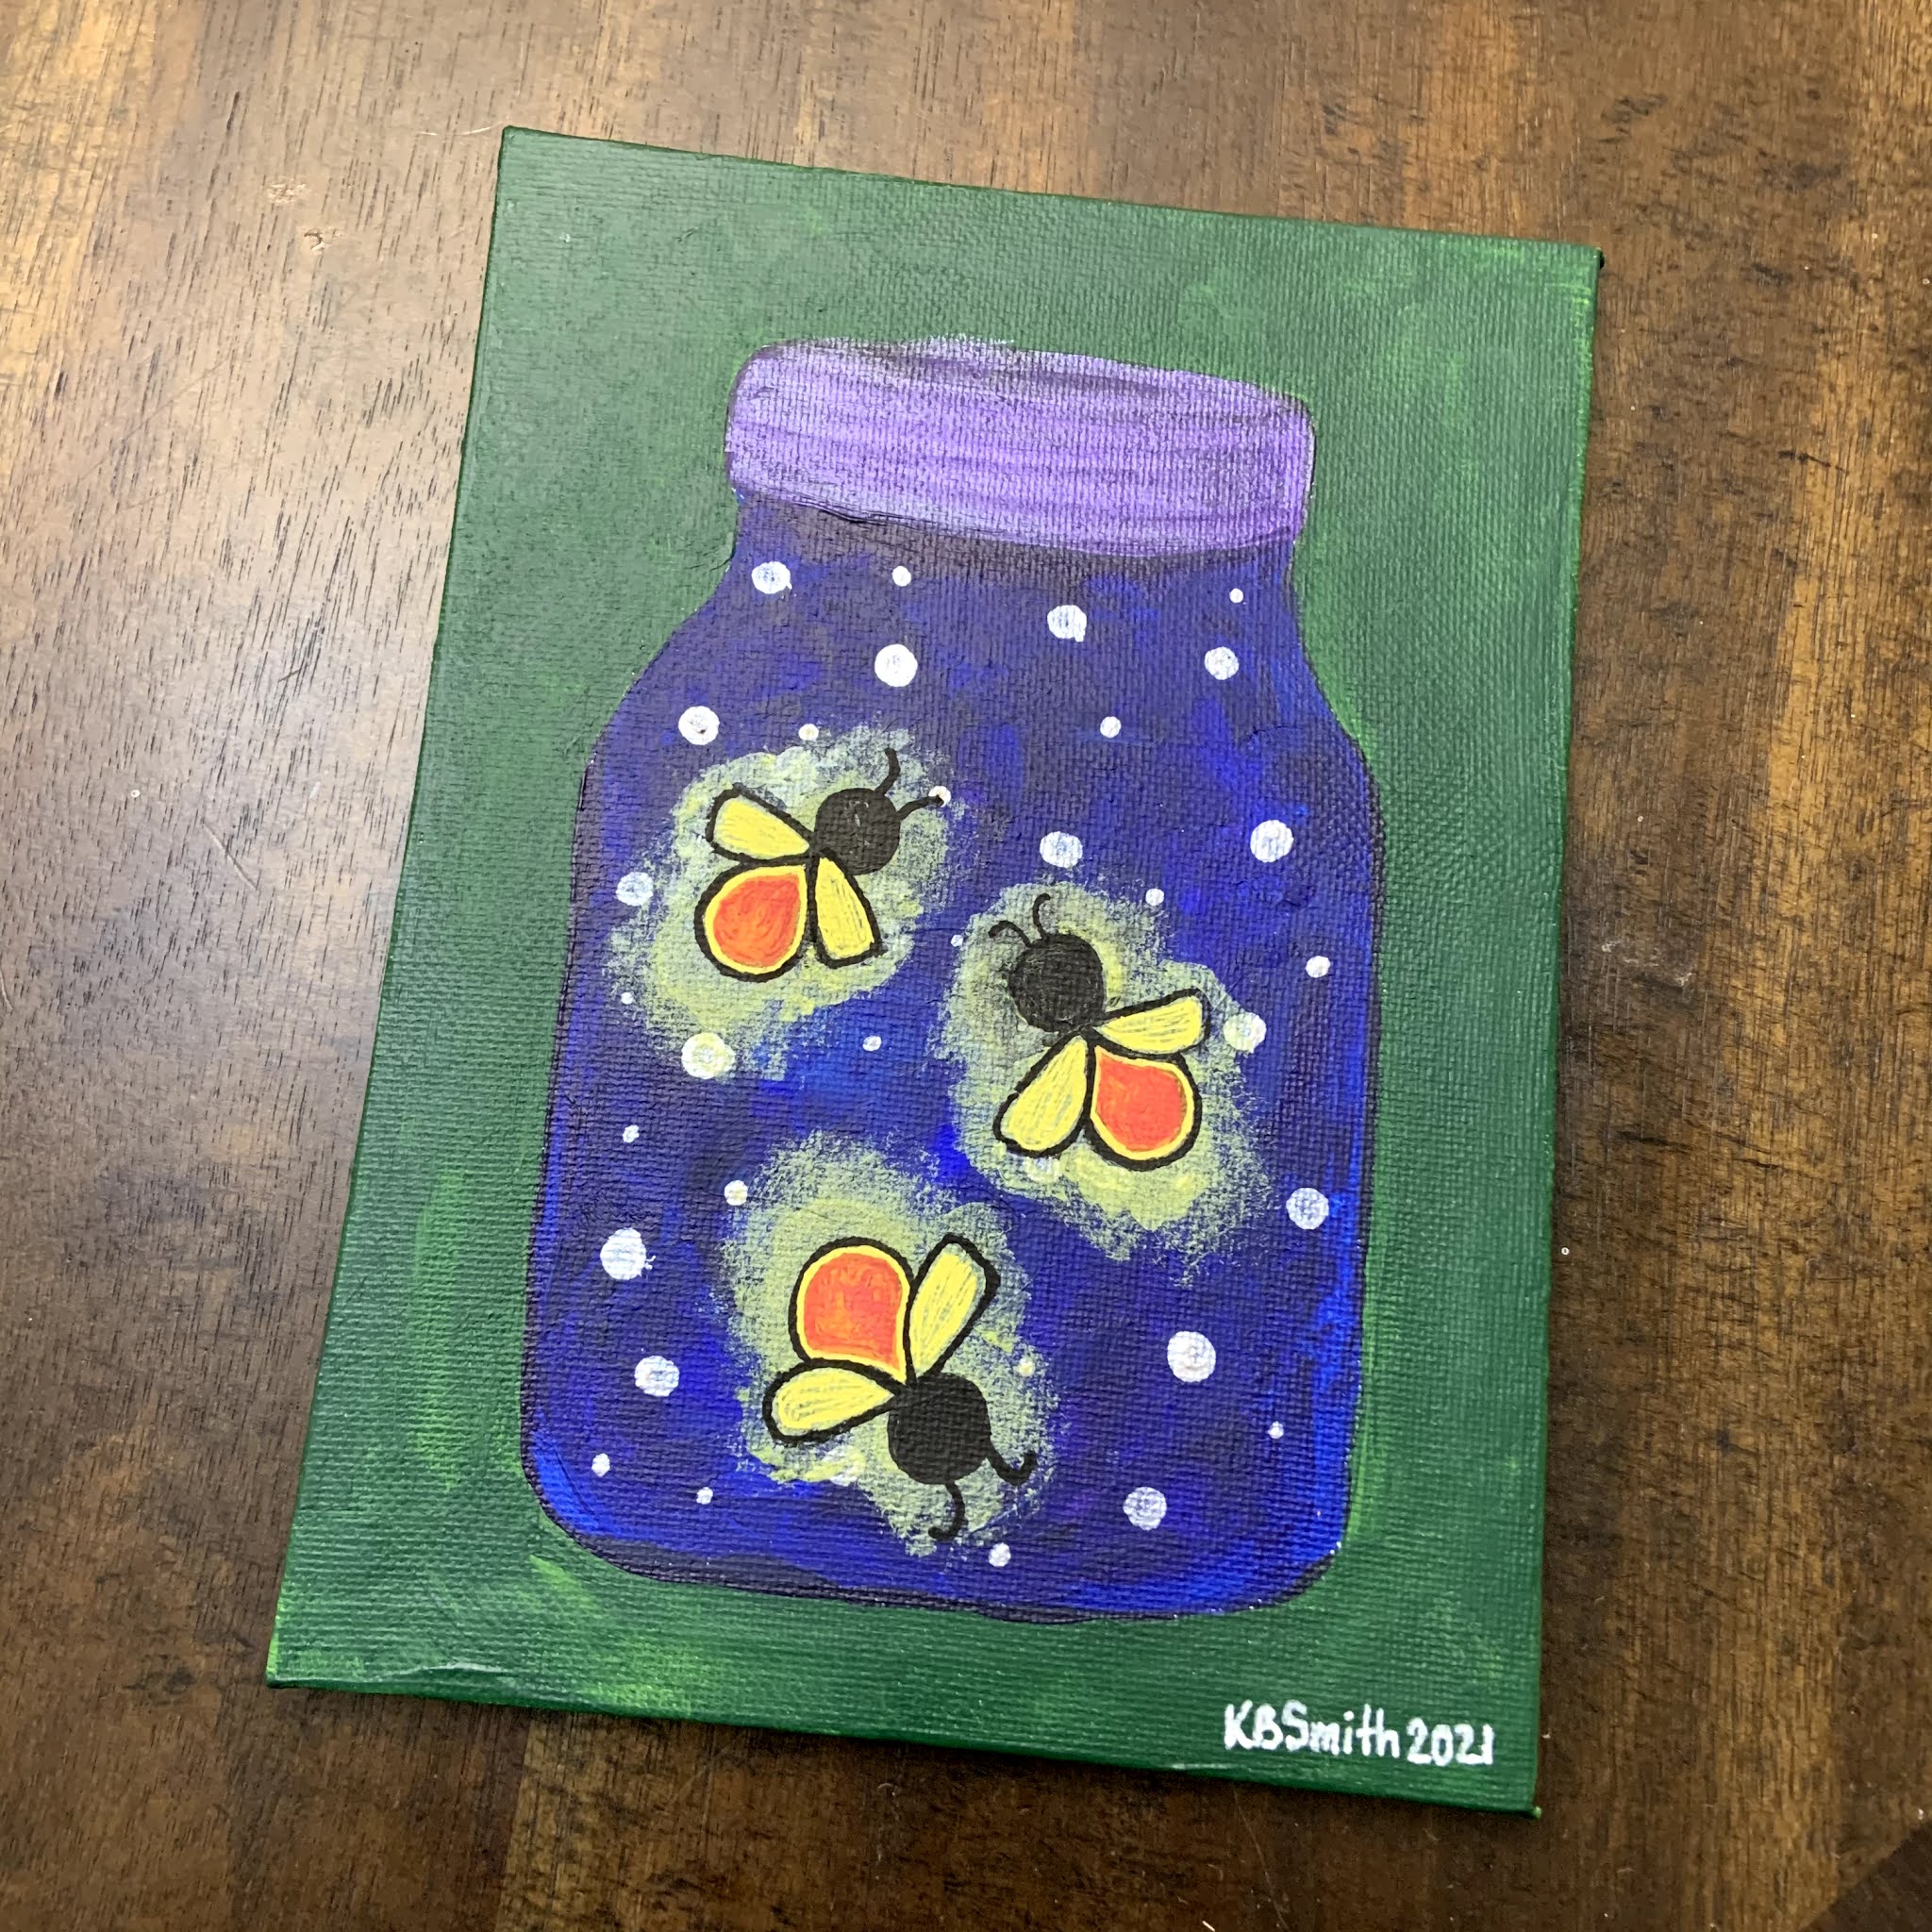
Once I brought the canvases home, my daughter and I took to Pinterest to find an image we thought would be fun to paint.  I came across a fab image from Grade Onederful of a mason jar filled with fireflies!  It was originally a watercolor picture, but we both looked at it and decided we could do it on canvases pretty easily!  

Before we started, I *did* gesso each canvas after we brought them home.  I bought a HUGE bottle of gesso to use for all acrylic painting projects awhile ago, and so I always make sure to gesso my cheap canvases because it improves the quality a ton AND it helps your paint to go further!  

We used Artist's Loft acrylic paint.  I have a good amount of it because it's inexpensive and our local Michael's has been great about doing curbside pickup!  We both started by sketching out our mason jars and fireflies on the canvas.  Then we painted!  


We used metallic white for the stars in the jars, and a sponge to make the yellow glow for the fireflies!  Then we used acrylic paint pens to draw and color in the fireflies!  


This was such a fun project that my daughter and I decided we are going to buy and make canvases for at least every season to hang in a spot in our home! 

Have you ever tried budget canvases for fun projects?  What would you paint for springtime?  Let me know in the comments below!  

Saturday, February 27, 2021

Sympathy Cards using Background Stencils

 Happy Saturday everyone!  This week, we got some sad news about a family friend that had passed away.  Because of this sad news, my daughter and I sat down and made some sympathy cards to send to their closest loved ones.  In my own style, I usually make sympathy cards that are less busy than my normal designs and often will try to make sure they are decently flat so they can be mailed.  

Lately, I have really been enjoying using my stencils to make backgrounds.  Last year, I bought a nice set of background stencils on Amazon for about $13.  It was around 25 stencils, so this was a total steal.  They are a bit smaller than the standard card size, so you usually have to work hard to get a seamless transition OR just work around it.  On this card, I used a strip of cardstock to hide the transition.  Even though these are a little smaller than what the stamp companies sell, the price for these was well worth it!!!  I use them all the time!  

I used several distress inks (Mermaid Lagoon, Lucky Clover, Cracked Pistachio, and Salty Ocean) to make the background.  After it was inked, I went over it with a lighter layer to make the background match.  I also inked a piece of cardstock for the inside to match.  

Years ago, I bought some ivory pearl cardstock from Paper Source for some wedding invitations.  I still have a whole pack of it that I recently remembered I had, and so I thought it would be the perfect base for this card.  


All of these sentiment stamps come from the Simon Says Stamp Sympathy Greetings Mix that I picked up last September.  It was one of the last stamp sets I have purchased, but I didn't have a good sympathy stamp set, so I know it will be used for many many years.  It also have some nice thinking of you and love sentiments, so it's a really versatile set.  

My lovely 7-yo daughter also wanted to make a card - and so she inked these sweet roses and stamped this beautiful sentiment on top.  I was really proud of how nice her card turned out, so I asked if I could share it here.  :-)  


Do any of you have go-to layouts for certain types of cards?  What are your favorite card making techniques right now?  Let me know in the comments below! 

Saturday, February 6, 2021

DIY - Easy, Fun Valentines Wreath!

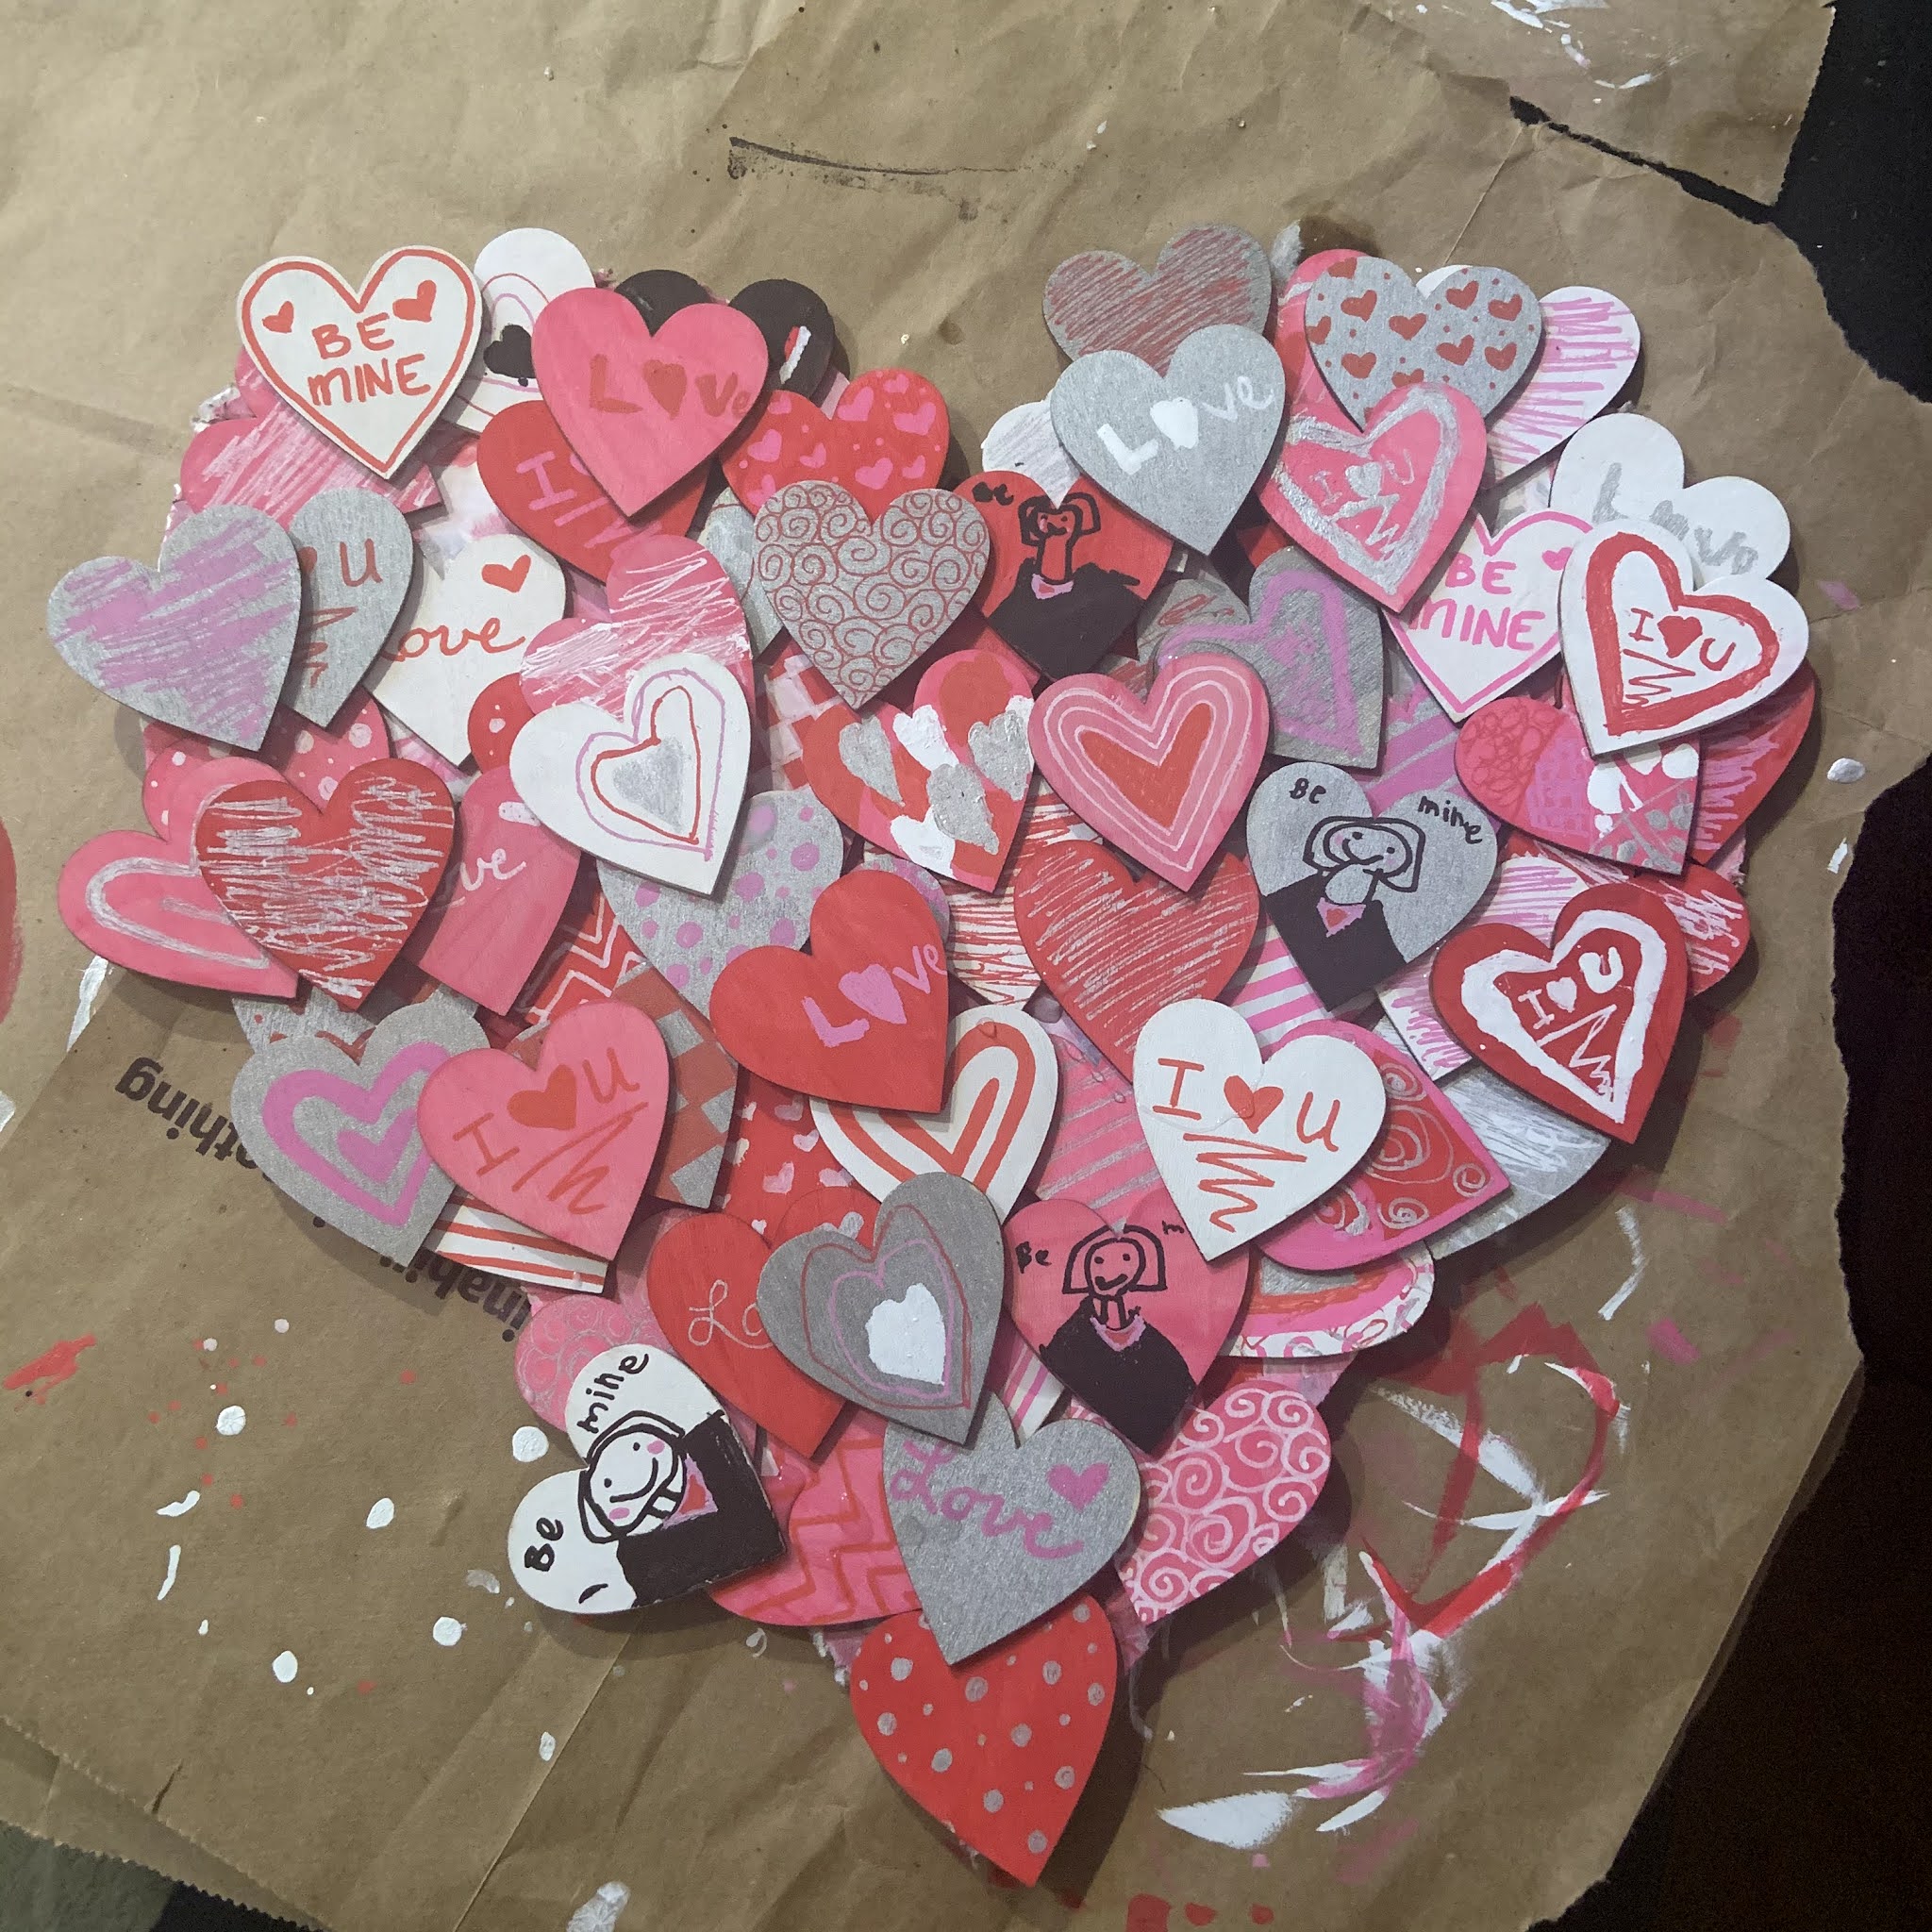
 What's up everyone!  So as Valentine's Day is *rapidly* approaching (checks status of Valentine gifts.... realizes she needs to send them NOW...), I wanted to share a fun, easy DIY project that my daughter and I did together.  We made a Valentine's Wreath out of wooden heart pieces and cardboard!  

Supplies for the Wreath: 

  • Wooden Hearts we used these from Amazon, $13.99.  We used about 2/3 of the hearts for our wreath.  
  • Red, Pink, White and Silver Craft Paint $3.20 ($0.79 each at Michaels)
  • Washable School Glue - $0.85 at Target, but we already had glue
  • Paint Brushes  - you can get a whole set of these for about $1 lots of places
  • A Large Cardboard Box
  • Craft Knife or Scissors
  • Ribbon
Optional: Paint or Posca Pens for decorating.  You could just as easily decorate these with the craft paints from above, but we used paint pens.  

Total Cost: $19.09 (or less depending on what you already have at home)

We started by painting about 80 of the wooden hearts solid colors (20 of each).  We let these dry overnight.

I then cut a heart out of an old cardboard box.  The dimensions ended up being about (enter dimensions here). Then, we splotched paint all over the heart so that the background wouldn't just be blank cardboard.  You *could* use wood for this step, but we are keeping our wreath inside in a temperature controlled part of the house, so we just used some leftover corrugated cardboard.    

Next, we took the hearts and made all kinds of designs on them!  Again, we did this step with paint pens, but you could just as easily do this step with the craft paint if that's what you have.  Some of them we made to look like conversation candy hearts, others we made with fun designs, and we also added a few with our names on them to personalize it!  Here's some of the decorating process.  


After the hearts were designed and dried, we started to glue them onto the wreath.  We tried to cover as much of the bottom layer as possible, and we let the layers dry a bit in between adding them.  We saved all of our name hearts for the very final layer.  This is the next to last layer: 


Finally, we used some duct tape and ribbon to make a hanger for the wreath.  You could also glue the ribbon to the back of the wreath, but our ribbon was thin and duct tape and knots kept it on the back quite securely.  The final product is hanging here on this door.  

This was a fun project that my daughter and I enjoyed doing together!  It took a few days because of all of the paint drying, but each step went pretty quickly so it was nice to fill some of our daily gaps with an art project.  I hope this inspired you to make something fun and personal with your kids!  Do you have any fun art traditions with your family?  Let me know in the comments below!  

Tuesday, January 19, 2021

DIY Gansai Tambi Storage and Palette

If you go back a few blog entries, you will see that I invested in the Holiday Sketchbox for 2020. That Sketchbox came with lots of fun goodies, but one of them that I keep going back to play with were a set of 6 Gansai Tambi paints.  I found that these paints were different than my other watercolors, but that I really liked them!  I wanted to be able to use these more broadly, and so I ended up using a birthday gift card to pick up an original set of 18 Gansai Tambi colors, so I would end up with a unique set of 24.  

Immediately, I realized that I LOVE the large pans! I'm having fun learning with them, but I wanted all 24 in one place.  I also really didn't like the paper washi boxes as storage.  While they were beautiful, I need something that isn't going to dissolve when I get it wet because I'm definitely messy.  I also wanted something that would have an included mixing palette, and so I went searching on the internet. 

And I searched, and I searched, and I searched, and I couldn't find something that fit the unique size of these paints and that had a palette.  

SO - I made my own!  Here are the steps I took to make this palette.  I hope this helps someone else out there who might be having the same problem with their Gansai Tambi (GT) paints!  

Step 1: Planning and Measurement

I wanted a thin, metal tin that could house the paints.  I looked at several different options before deciding that a colored pencil tin would be the best option!  I had 24 paints measuring 1" by 2.5", so I needed something that would cover 60 square inches BUT that would also fit the paints correctly.  I ended up with this pencil tin, which was about 82.5 square inches and would be able to fit a total of 33 pans of GT paint, giving me some wiggle room to expand my collection in the future but keeping the size reasonable: 

**Note: Don't worry, these pencils were moved to a pencil case and my daughter was absolutely OVER THE MOON to get a brand new set of watercolor pencils!  Once she swatches them and plays with them I'll let you know what we think!  If I had a spare pencil tin that worked I would have used that instead!  

Step 2: Making the Palette Lid

I bought some high gloss white enamel spray paint.  I sprayed the lid 3 times using the directions on the paint can, and then let the paint dry for a solid 24-36 hours.  Then I fit the lid onto the tin several times to make sure everything fit.  There was slight peeling in the inner corners of the palette that I may seal over time, but for right now I doesn't seem to be causing any problems.  I included a picture showing how nice, white and shiny the lid looks!  

Painted Lid - After Drying

See How Shiny?!?!?!


Step 3: Assembling the Palette

Next, I bought some magnets that are meant to fit on the bottom of watercolor half pans, and I attached them to the middle of the GT paint pans.  I took a sharpie and wrote the number of each paint on the bottom as well since I was going to cover it with the magnets.  You could definitely use stronger magnets, but for my purposes I just needed them to hold the paints in place and not necessarily pass an earthquake test.  I probably wouldn't take this palette on a vacation with me, but it will be nice and easy to move around various parts of my house or over to a friends house eventually.  

I placed the paints in the color order that I prefer, and I kept the plastic piece from the set of 18 just to give some protection from the top palette.  I also made a swatch card that will fit into the tin as well.  Then, I cut up a sponge and used tape to fit it into the side of the tin to keep the paints from moving and to be used with a waterbrush.  

There is still room to fit another whole row at the bottom of the tin, and if I removed the sponge I could fit 3 extra paints along that side comfortably.  

Step 4: Final Touches

I'm keeping a water brush and a roll of washi tape in here for now because I have the space.  I'm also using stickers to cover the top of the tin to customize the palette, but you could definitely paint the top if you prefer!  I'm super happy with how this has turned out and was glad that my DIY worked to solve a problem!  

All Finished!  

Everything Put Together Without the Lid

Final Notes:  This solution has worked really well for me.  It keeps my paints in one place and allows me to move around easily while still having a mixing palette!  As far as cost goes, I paid about $20 for the tin (including the pencils!), $4 for the paint, and I had the magnets but you could buy them on amazon for $6-7.  So for under $30, I made the solution I wanted and I'm very happy with it!  


Do you have Gansai Tambi paints?  How do you store them? Let me know in the comments!